Edit June 2023: Added a section on Colima
MacOS is a Unix but it isn’t a Linux so, unfortunately, if/when we need to use linux-y things like docker we need to install a VM just like in the Windows world. That’s of course also true for docker.
Like most people I’ve been using Docker Desktop for a lot of years to get my fix for container. It works pretty well, good even for almost everything. I don’t remember exactly when, Docker desktop added support for running Kubernetes. That looks good on paper and technically it works but not without a price… (at least on my Mac) it also comes with fans a-blazing and the soundtrack of a 747 taking off. Luckily, most of the time I have access to remote Kubernetes servers so I rarely used the option but whenever I did (re)try it, I quickly tuned it back off.
Installing Kubernetes
Last month I went through the whole new computer setup thingy (you know, the important stuff, like setting up a development font, themes for all editors etc :) ), I also decided to see if I can get Kubernetes running without paying the noise-tax – and it seems that its doable with couple of simple steps:
brew install hyperkit
brew install minikube
minikube start
if you like you can also define the resources for the minikube image before you start it up
minikube config set cpu <whatever>
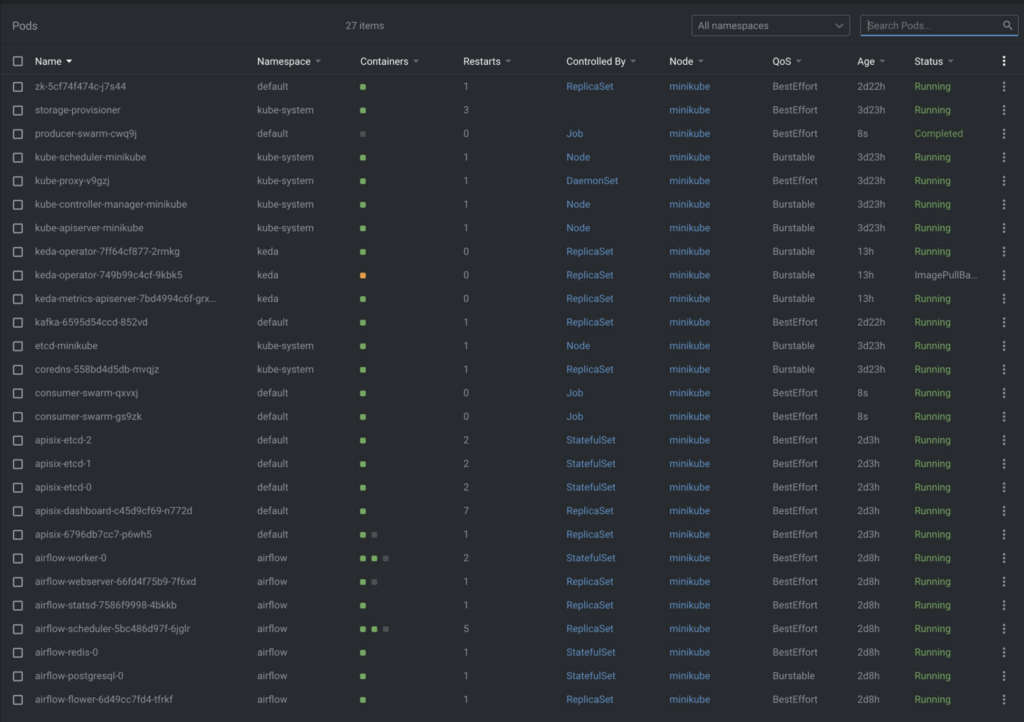
minikube config set memory <whatever>tada working Kubernetes without all the fan-fare (pardon the pun). Here’s an image of Lens with my local cluster running 25+ containers (though you’d have to take my word that the machine is quiet :) )
Getting Docker to run
eval $(minikube docker-env)At this point you can kubectl deploy anything that is already existing – but what do you do if you want to deploy an image created locally? well, that’s not complicated either you need to build the image on the docker minikube is using :
you can then docker build -t <whatever> . (or any other docker command for that matter) as usual.
It works so well I added the eval command to my .zshrc file and just stopped using docker desktop altogether.
Docker Desktop license change
Coda : A day or so ago, I saw that Docker is trying to monetize Docker Desktop and require a subscription license for businesses, so not only this seems to be working better (for me anyway) using hypekit+minikube can also be a good solution for devs who don’t want/can’t get their orgs to pay for a subscription so another plus here.
if you uninstall docker desktop you will need to install the docker CLI which is still using an apache 2.0 license:
brew install dockerWhat about Podman?
The Docker Desktop license change made this post rather popular. As I wrote above it seems that the Docker CLI is still Apache 2.0 (at the time of writing :) ), and so there’s no need to drop it, if licensing is the reason for change.
That said, there’s also a complete alternative to Docker CLI called Podman. installing it on MacOS is the predictable
brew install podmanPodman, like the docker CLI needs a linux VM to work with if run on a mac. As it happens minikube also has podman installed on its VM which you can utilize via eval $(minikube podman-env) – unfortunately, minikube has podman v.2.2.1 and the version installed by brew is the latest (v.3.3.1) and they are not compatible.
If you also need Kubernetes, like I do, I’d stay with the Docker CLI. if, however you just need to build containers – you can migrate to Podman easily – by running
podman machine init # one time to download and setup a VM
podman machine start Code language: PHP (php)
Podman seem to be compatible with the Docker CLI (though it adds a few specific commands like machine and system) so you can build/pull etc. like before.
One note about building images with Podman: I tried building one of my existing Dockerfiles with Podman and got the following error: “Error: error creating build container: short-name resolution enforced but cannot prompt without a TTY“. The reason is that while Docker assumes images come from docker hub by default, You need to specify them with Podman , so changing FROM apache/airflow:2.1.2 to FROM docker.io/apache/airflow:2.1.2 solved the problem
Colima
Working with minikube is fine and works pretty well, there were however a few quirks like mounting the Mac’s drive inside containers etc. Enter Colima
Colima is a minimal setup docker & Kubernetes solution for Macs (including M*) that just works. Simply:
brew install colima
colima start --cpu 6 --memory 12 --disk 200 --with-kubernetesCode language: JavaScript (javascript)
Note that I set up the instance with a large disk. The reason for that is that that increasing the disk means a creating a new one and it should be big enough to hold all the images you use (both in k8s and any docker images you build or consume outside of it)